
I used to think DIY skincare was just something people did to feel crafty. Then I calculated what I was spending on face mists (those bottles disappear fast when you’re reapplying throughout the day), and suddenly making my own seemed a lot less silly.
Face mists aren’t complicated products. Most commercial versions are water, a few hydrating ingredients, maybe some plant extracts for scent, and preservatives. The ingredients themselves are cheap. What you’re paying for is the packaging, branding, and convenience. When you’re on a student budget and going through a bottle every few weeks, that markup adds up fast.
Rose Water Basics
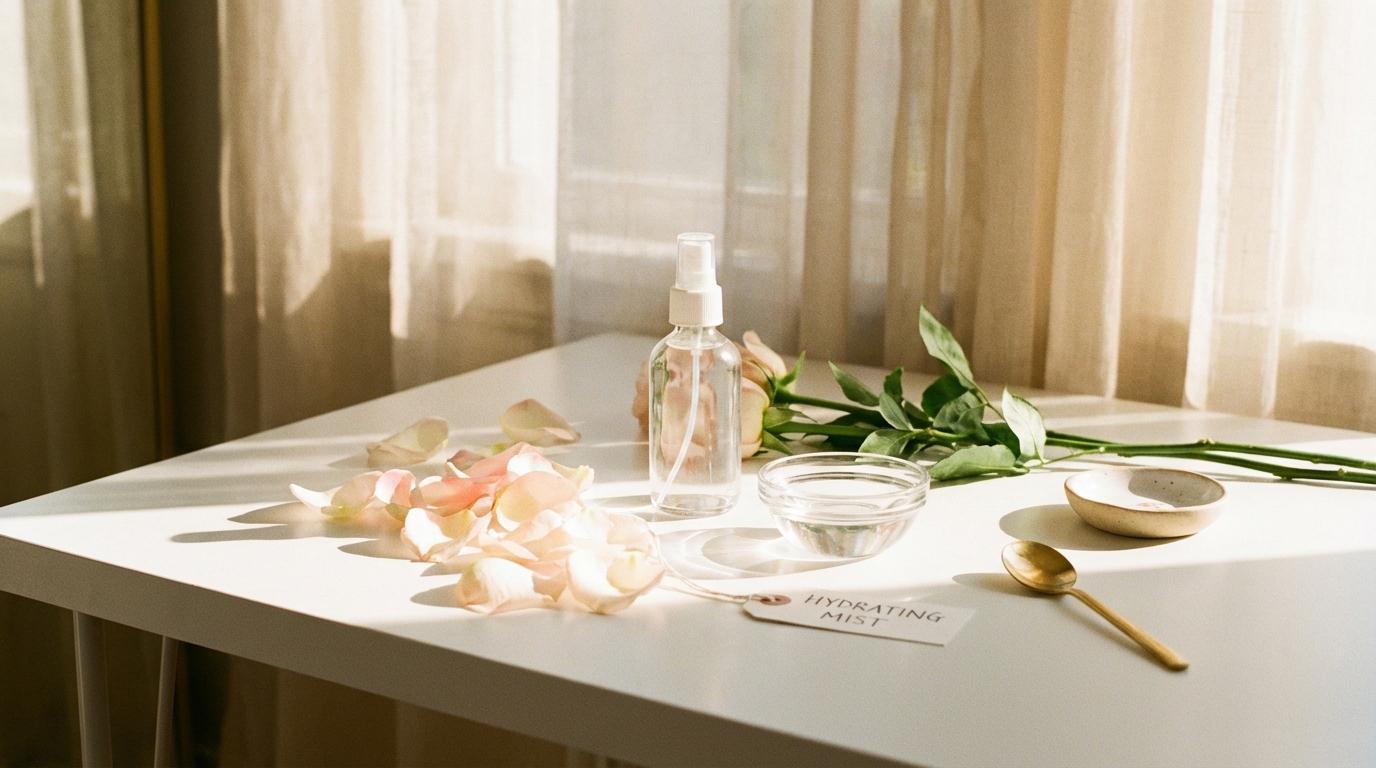
Rose water is the simplest DIY mist you can make because you barely have to make anything. Pure rose water, the kind sold for cooking in Middle Eastern grocery stores or the international aisle, is already a ready-to-use product. Check the ingredient list: you want rose water or rosa damascena flower water, not water with rose fragrance added.
Pour it into a spray bottle. That’s it. That’s the recipe.
I buy the Cortas or Sadaf brand from my local grocery store for around $4 per bottle, and it lasts me about two months of regular use. The same volume of a “luxury” rose water mist would cost $20 or more. The ingredient is literally identical.
Rose water has mild soothing properties and feels refreshing on skin. It won’t perform miracles, but as a quick hydration boost or setting spray, it works perfectly fine. The scent is natural and fades within a few minutes.
One thing to watch: some rose waters are made by simmering rose petals in water, while others are actual steam-distilled hydrosols. The distilled versions contain more of the beneficial plant compounds, but honestly for a face mist, either works. If you can find hydrosol specifically, great. If not, the cooking rose water from the grocery store does the job.
Adding Glycerin for Extra Hydration
Plain rose water delivers moisture, but it evaporates quickly. Adding glycerin helps that hydration stick around longer because glycerin is a humectant, meaning it pulls water from the air and holds it against your skin.
The ratio I use is about 1 tablespoon of vegetable glycerin to 1 cup of rose water. Mix thoroughly and pour into your spray bottle. You can adjust this based on preference: more glycerin makes the mist feel slightly stickier, less feels more like plain water.
Vegetable glycerin costs around $5-8 for a bottle that will last you months of mist-making. You can find it at craft stores, pharmacies, or online. Make sure it says vegetable glycerin or vegetable-derived glycerin, not petroleum-based. Both work, but the plant-based version feels nicer on skin.
The glycerin addition makes the mist better at helping subsequent products absorb. Applying serum to skin dampened with a glycerin mist can improve penetration compared to applying to completely dry skin.
One caution: glycerin pulls moisture from wherever it can find it. In humid environments, it pulls from the air, which is ideal. In very dry climates, it might pull moisture from deeper skin layers instead, which is counterproductive. If you live somewhere arid, use less glycerin or skip it entirely.
Green Tea Version
Green tea as a face mist sounds like something your aunt would suggest, but there’s actual science here. Green tea contains EGCG, a polyphenol with antioxidant and anti-inflammatory properties. Studies show topical application can help with UV protection and reducing redness.
To make green tea mist, brew a cup of green tea using filtered water. Let it steep for at least 5 minutes to extract the beneficial compounds, then let it cool completely before transferring to a spray bottle.
You can use plain green tea as your mist, or combine it with the glycerin addition for extra hydration. Some people add a splash of rose water for scent, since plain green tea smells like, well, tea.
The catch is shelf life. Fresh brewed tea will start growing bacteria within a couple of days, even refrigerated. If you make a green tea mist, keep it in the fridge and use it within 3-4 days. Make small batches rather than a huge bottle that goes bad before you can use it.
For a slightly longer-lasting version, you can add a few drops of vitamin E oil, which acts as a mild preservative. This extends the useful life to maybe a week, but you’re still looking at frequent batch-making compared to the commercial versions with proper preservative systems.
Proper Storage Matters
DIY mists lack the preservative systems that keep commercial products shelf-stable for years. This is the trade-off for avoiding synthetic ingredients and saving money: your products have shorter lifespans and need more careful handling.
Keep your mist in the refrigerator. The cold temperature slows bacterial growth and also makes the mist feel extra refreshing when you spray it on. Win-win.
Use clean spray bottles, ideally ones you’ve washed with soap and hot water and let dry completely before filling. Glass bottles are ideal because they don’t absorb odors or residue and are easier to sanitize. Plastic works fine too, just make sure it’s clean.
Label your bottles with the date you made the mist. It’s easy to lose track, and you don’t want to spray week-old bacteria water on your face. When in doubt, toss it and make a fresh batch.
For the pure rose water mist (no glycerin, no tea), shelf life is longer because rose water already has mild antimicrobial properties. These can last a couple weeks at room temperature or longer refrigerated. But once you start adding other ingredients, bacterial growth becomes more likely.
If your mist starts smelling off, looking cloudy, or developing any visible particles, throw it away immediately. No mist is worth a skin infection.
Making It Practical
The whole point of saving money on mists is actually using what you make. A perfect recipe sitting in your fridge untouched doesn’t help anyone.
I keep a small spray bottle (the 2oz travel size) in my bag and refill it from the larger batch in my fridge. This way I’m not lugging around a huge bottle or worrying about the whole batch going bad from being at room temperature all day. The small amount in my bag gets used up quickly enough that spoilage isn’t an issue.
For the green tea version especially, I make only as much as I’ll use in a few days. Sometimes that means brewing a single cup of tea, letting it cool, and putting it directly in my travel spray. It takes about 10 minutes of actual effort spread across waiting for things to cool.
The cost breakdown after a few months of doing this: I’ve spent maybe $15 total on ingredients (rose water, glycerin, green tea bags I already had). A comparable amount of commercial mists would have run $50 or more. For a college budget, that difference adds up.
When DIY Doesn’t Make Sense
DIY mists work great for basic hydration and refreshing throughout the day. They’re not a replacement for products with complex active ingredients or proper delivery systems.
If you want a mist with niacinamide, hyaluronic acid at specific molecular weights, or other actives, buy a commercial version. These ingredients require specific formulation to remain stable and effective. You can’t just dissolve a supplement capsule in water and spray it on your face (please don’t try this).
Similarly, if you have sensitive or reactive skin, commercial products with proper pH balancing and tested formulas might be safer than homemade versions with variable pH depending on your water source and ratios.
I think of DIY mists as a budget-friendly solution for a specific purpose: quick hydration throughout the day, setting makeup, making skin damp before applying serums. For these uses, homemade works great. For treatment products, stick with formulations that were actually designed and tested.
Quick Recipe Reference
Basic rose water mist: Pour pure rose water into a spray bottle. Keep refrigerated. Use within 2-3 weeks.
Hydrating rose water mist: Mix 1 cup rose water with 1 tablespoon vegetable glycerin. Shake well before each use. Refrigerate, use within 2 weeks.
Green tea mist: Brew green tea, steep 5+ minutes, cool completely. Refrigerate, use within 3-4 days.
Green tea hydrating mist: Cooled green tea plus 1 teaspoon glycerin per cup. Refrigerate, use within 3-4 days.
Optional additions: A few drops of vitamin E for mild preservation. A splash of rose water in your green tea for better scent. Aloe vera gel (about 1 teaspoon per cup) for extra soothing, but this shortens shelf life further.
Total cost to get started: Around $15 for ingredients that will make many batches. Compare that to $15-30 for a single bottle of similar commercial product. The savings are real, and the products work just as well for their intended purpose. Just keep them refrigerated, use them quickly, and you’re set.